


Travisher Sharpening Tools
With a video for paid subscribers.

I’ve sharpened travishers for more than 20 years. But until two years ago, I never thought I had the operation down to where I was 100-percent happy.
As of now, I have sharpening tools I like. And I have a process that I can teach to students and my apprentice Kale, and they all get good edges, too.
Before I explain the tools and methods, I offer this disclaimer: There might be better tools and processes out there. But the following tools and process suit me. I avoid jigs (unless they are overwhelmingly better than hand sharpening – like the ubiquitous side-clamp honing guide). I don’t care for a rounded bevel – I prefer a flat bevel because it’s easier for me to maintain. And I don’t like sharpening media that is a big ongoing investment, such as abrasive papers, films and paste.
Finally, I like fast and repeatable techniques.
So here we go.
Travishers take a lot of abuse in our shop. Students who are new to the tools are heavy-handed with these fine edge tools. And we generally use travishers to saddle difficult hardwoods: ash, oaks, hickory, elm and maple. So if you saddle only white pine or basswood with your travishers, you might not need to get as aggressive as I do. You can get away with simply polishing the bevel and back of the tool’s blade to keep it in order.
Me, I need something more aggressive. After many years, I settled on the large DMT diamond cone in fine grit (this is about 25 micron, which removes metal like a #1,000-grit waterstone). If you are yelling at your computer screen right now because I am praising a diamond stone, read this footnote.1 The cone is ideal for sharpening a travisher blade. You put a finger inside the cone as you stroke the tool’s bevel. And this gives me way more feedback than a slipstone. The feedback (it’s like you are touching the bevel) makes it easy to keep the diamond cone flat on the tool’s bevel.
I use camellia oil as a lubricant, though any light oil or water will do. We happen to have camellia on hand, and it is non-toxic.
I hold the tool with my left hand and hone the bevel flat with my right. No micro-bevel. I just keep the cone flat on the bevel, and I stroke it back and forth until I turn a slight burr on the backside of the blade.
When that happens, I am done with the cone. I wipe off the oil and put the cone away.


Polish the Edge
For years I polished my travishers’ bevels with waterstones that were in the shape of a slipstone. But the waterstones needed to be soaked before use. And they were messy. Then I tried diamond film on dowels and other wooden shapes. They wore out fast. Two years ago, I switched to oilstones to polish the bevel, and I’ve been very happy.
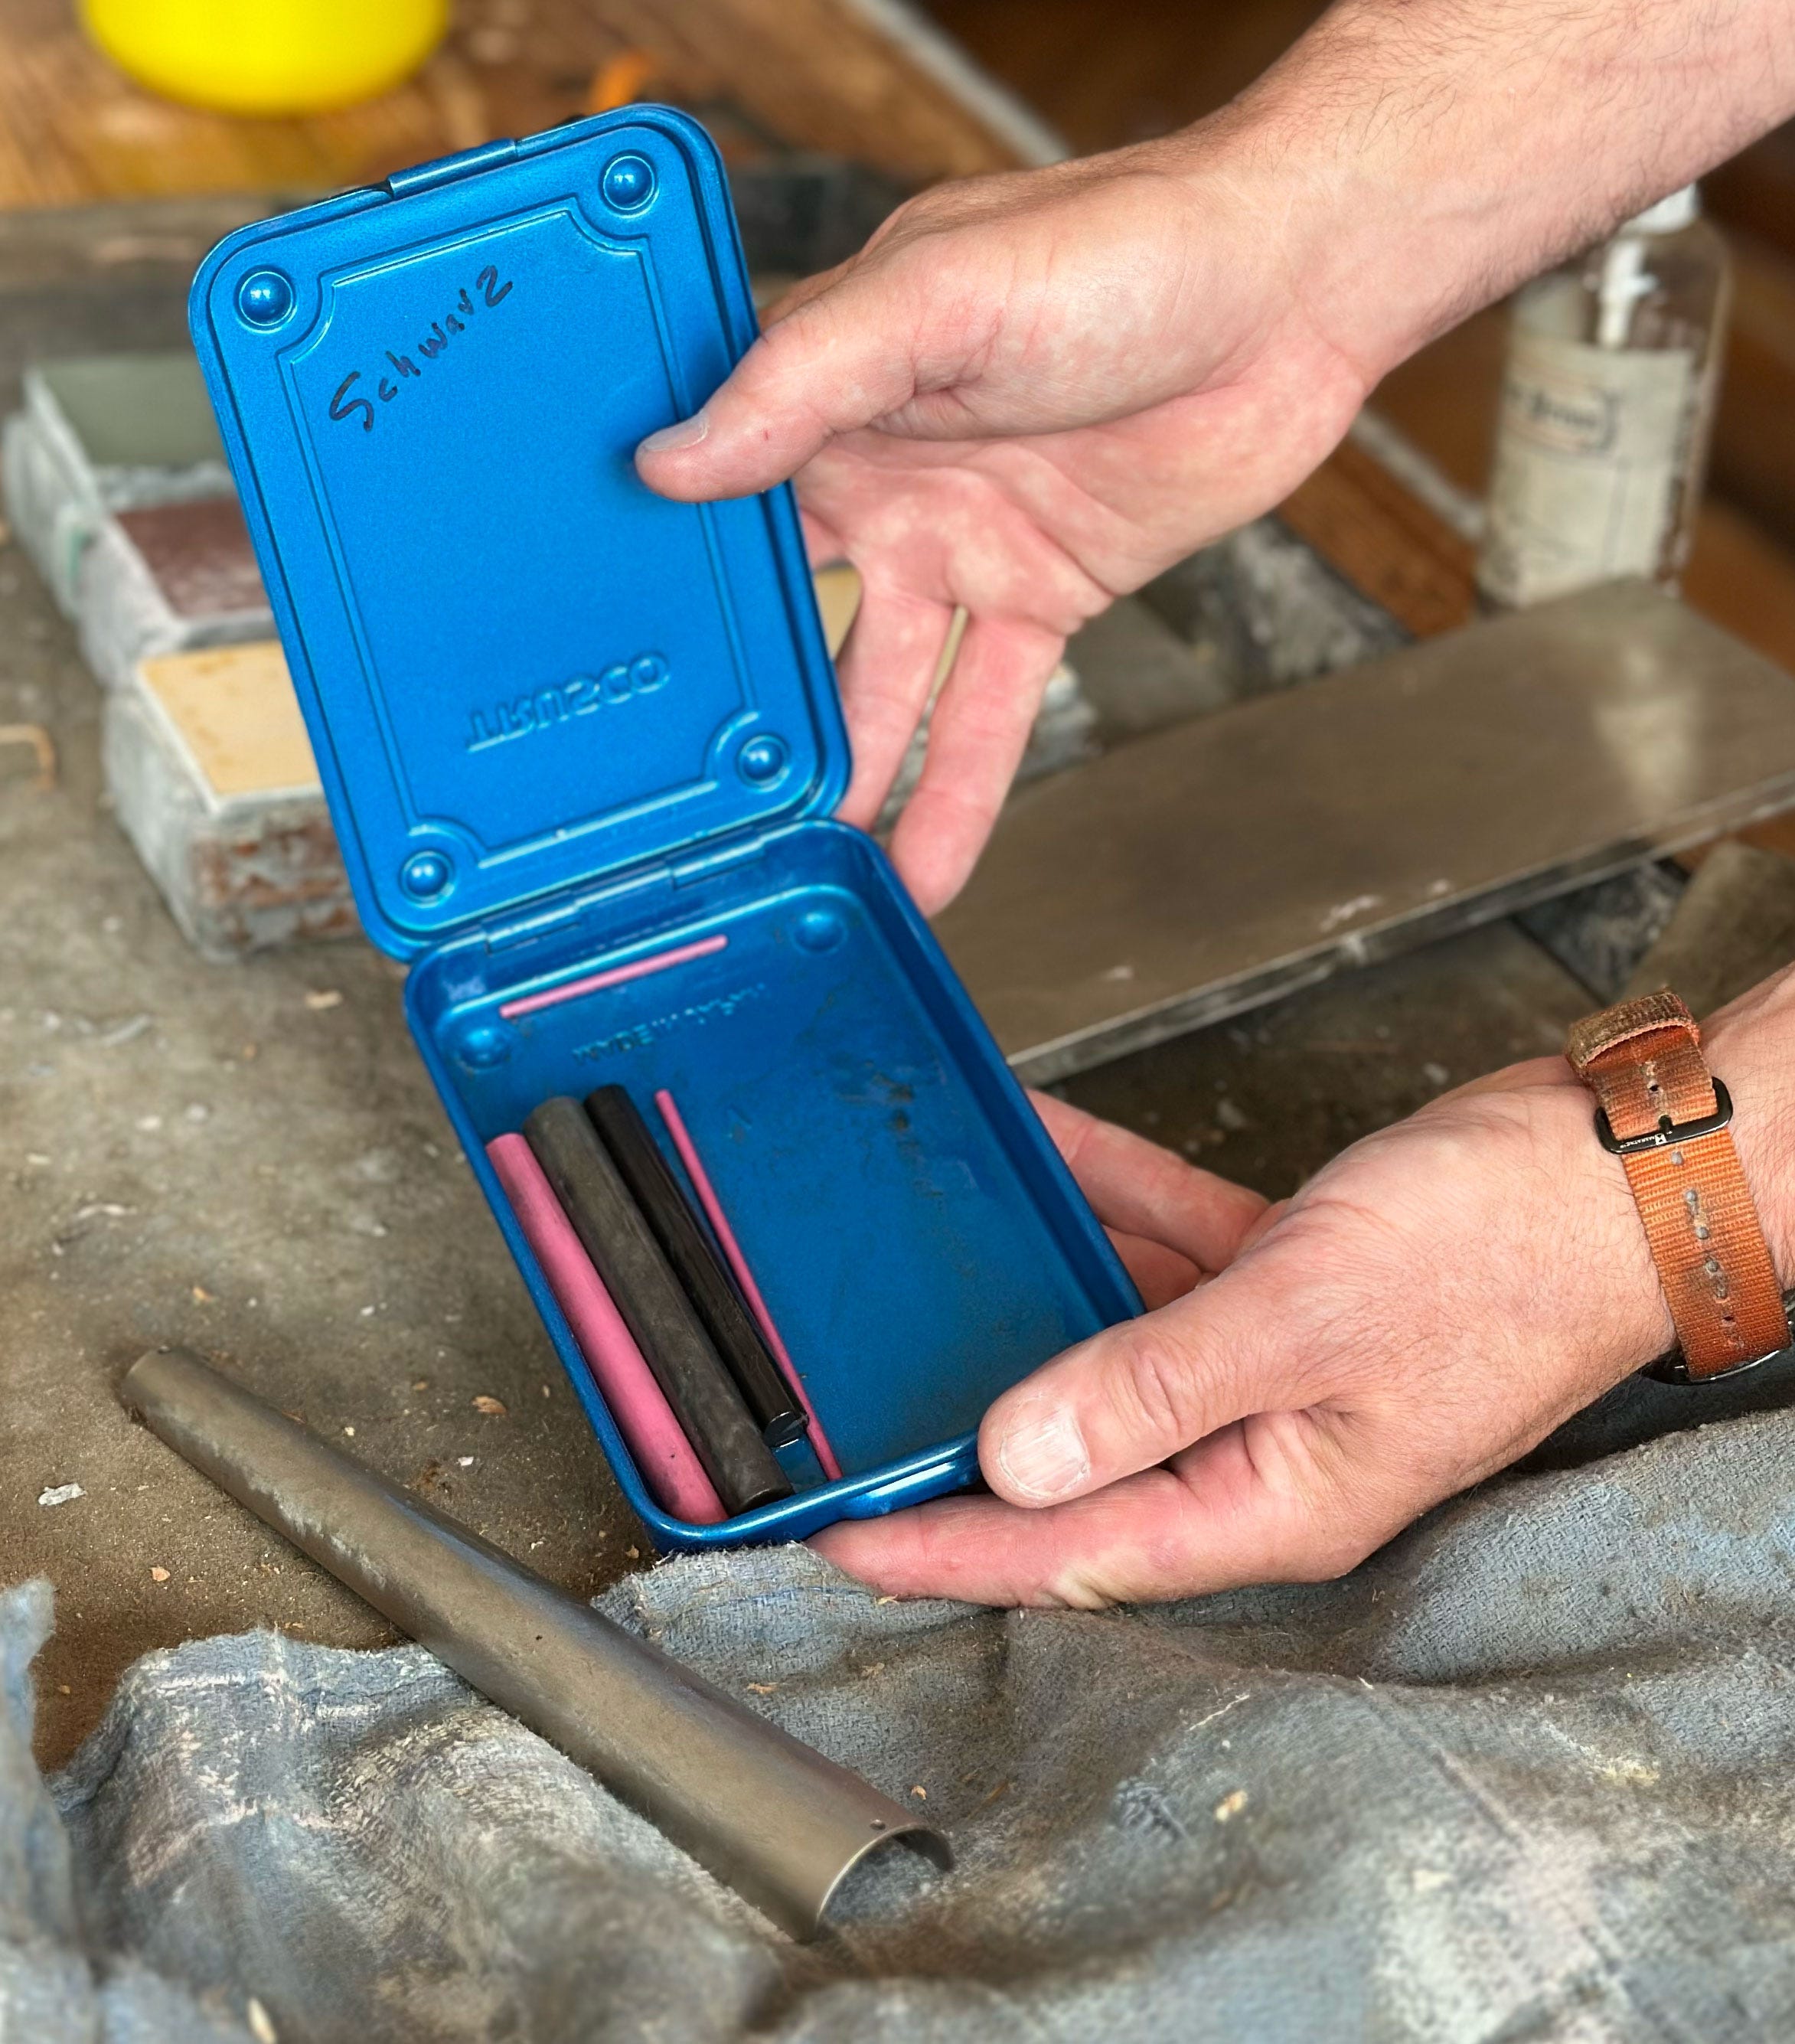
I use two natural oilstones from Dan’s Whetstones. I use what are called “round Arkansas files.” These are essentially oilstones in a dowel shape. I use a “hard Arkansas” and a “true hard Arkansas.” The exact dimensions of the files aren’t important. Buy what you can afford. They are all fine for this job.
I keep these soaking in some oil in a metal Trusco box, which has a seamless bottom that won’t leak and a tight-fitting lid that prevents the oil from drying out. As a result, the oilstones are always ready to go.
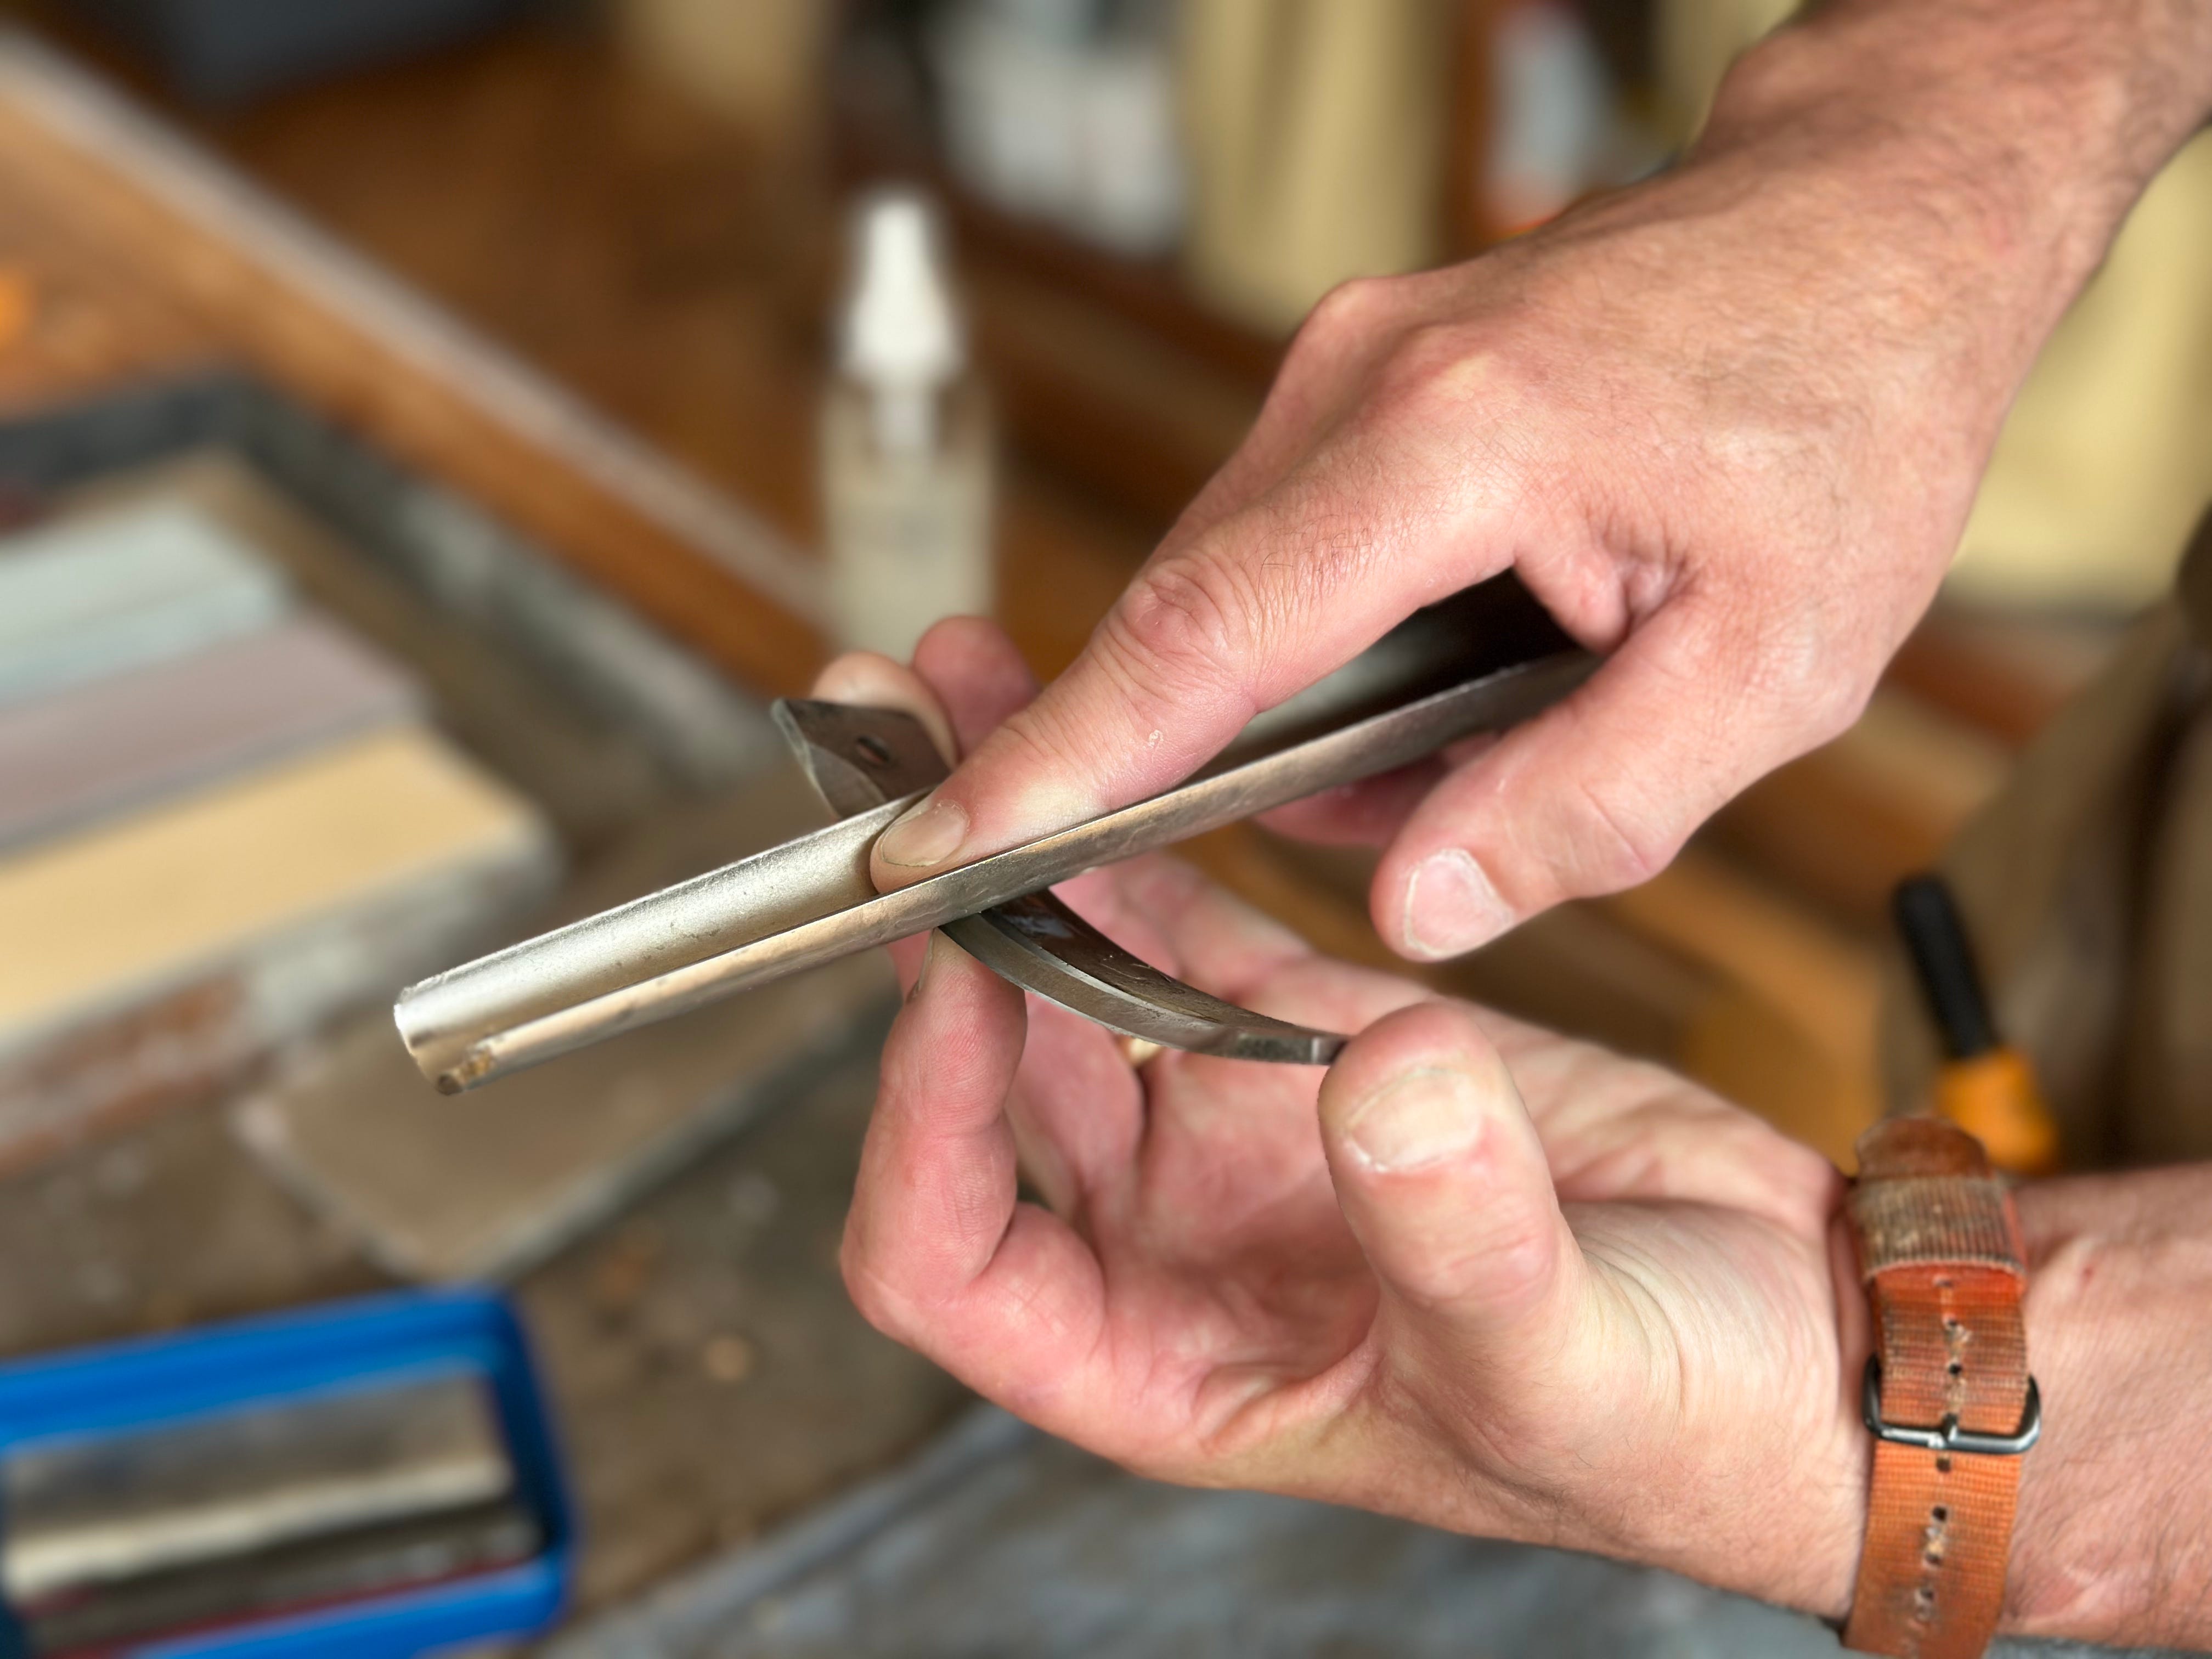
I polish the bevel first with the hard Arkansas file. This file has a little bite to it – not enough to turn a burr (that I can feel). But you can feel the stone removing metal.
I polish the bevel until the scratches from the diamond cone are gone. This takes less than five minutes. Then I repeat the process with the true hard Arkansas file. It glides over the bevel and polishes things up nicely. Again, less than five minutes of work is all it takes to get the edge polished.
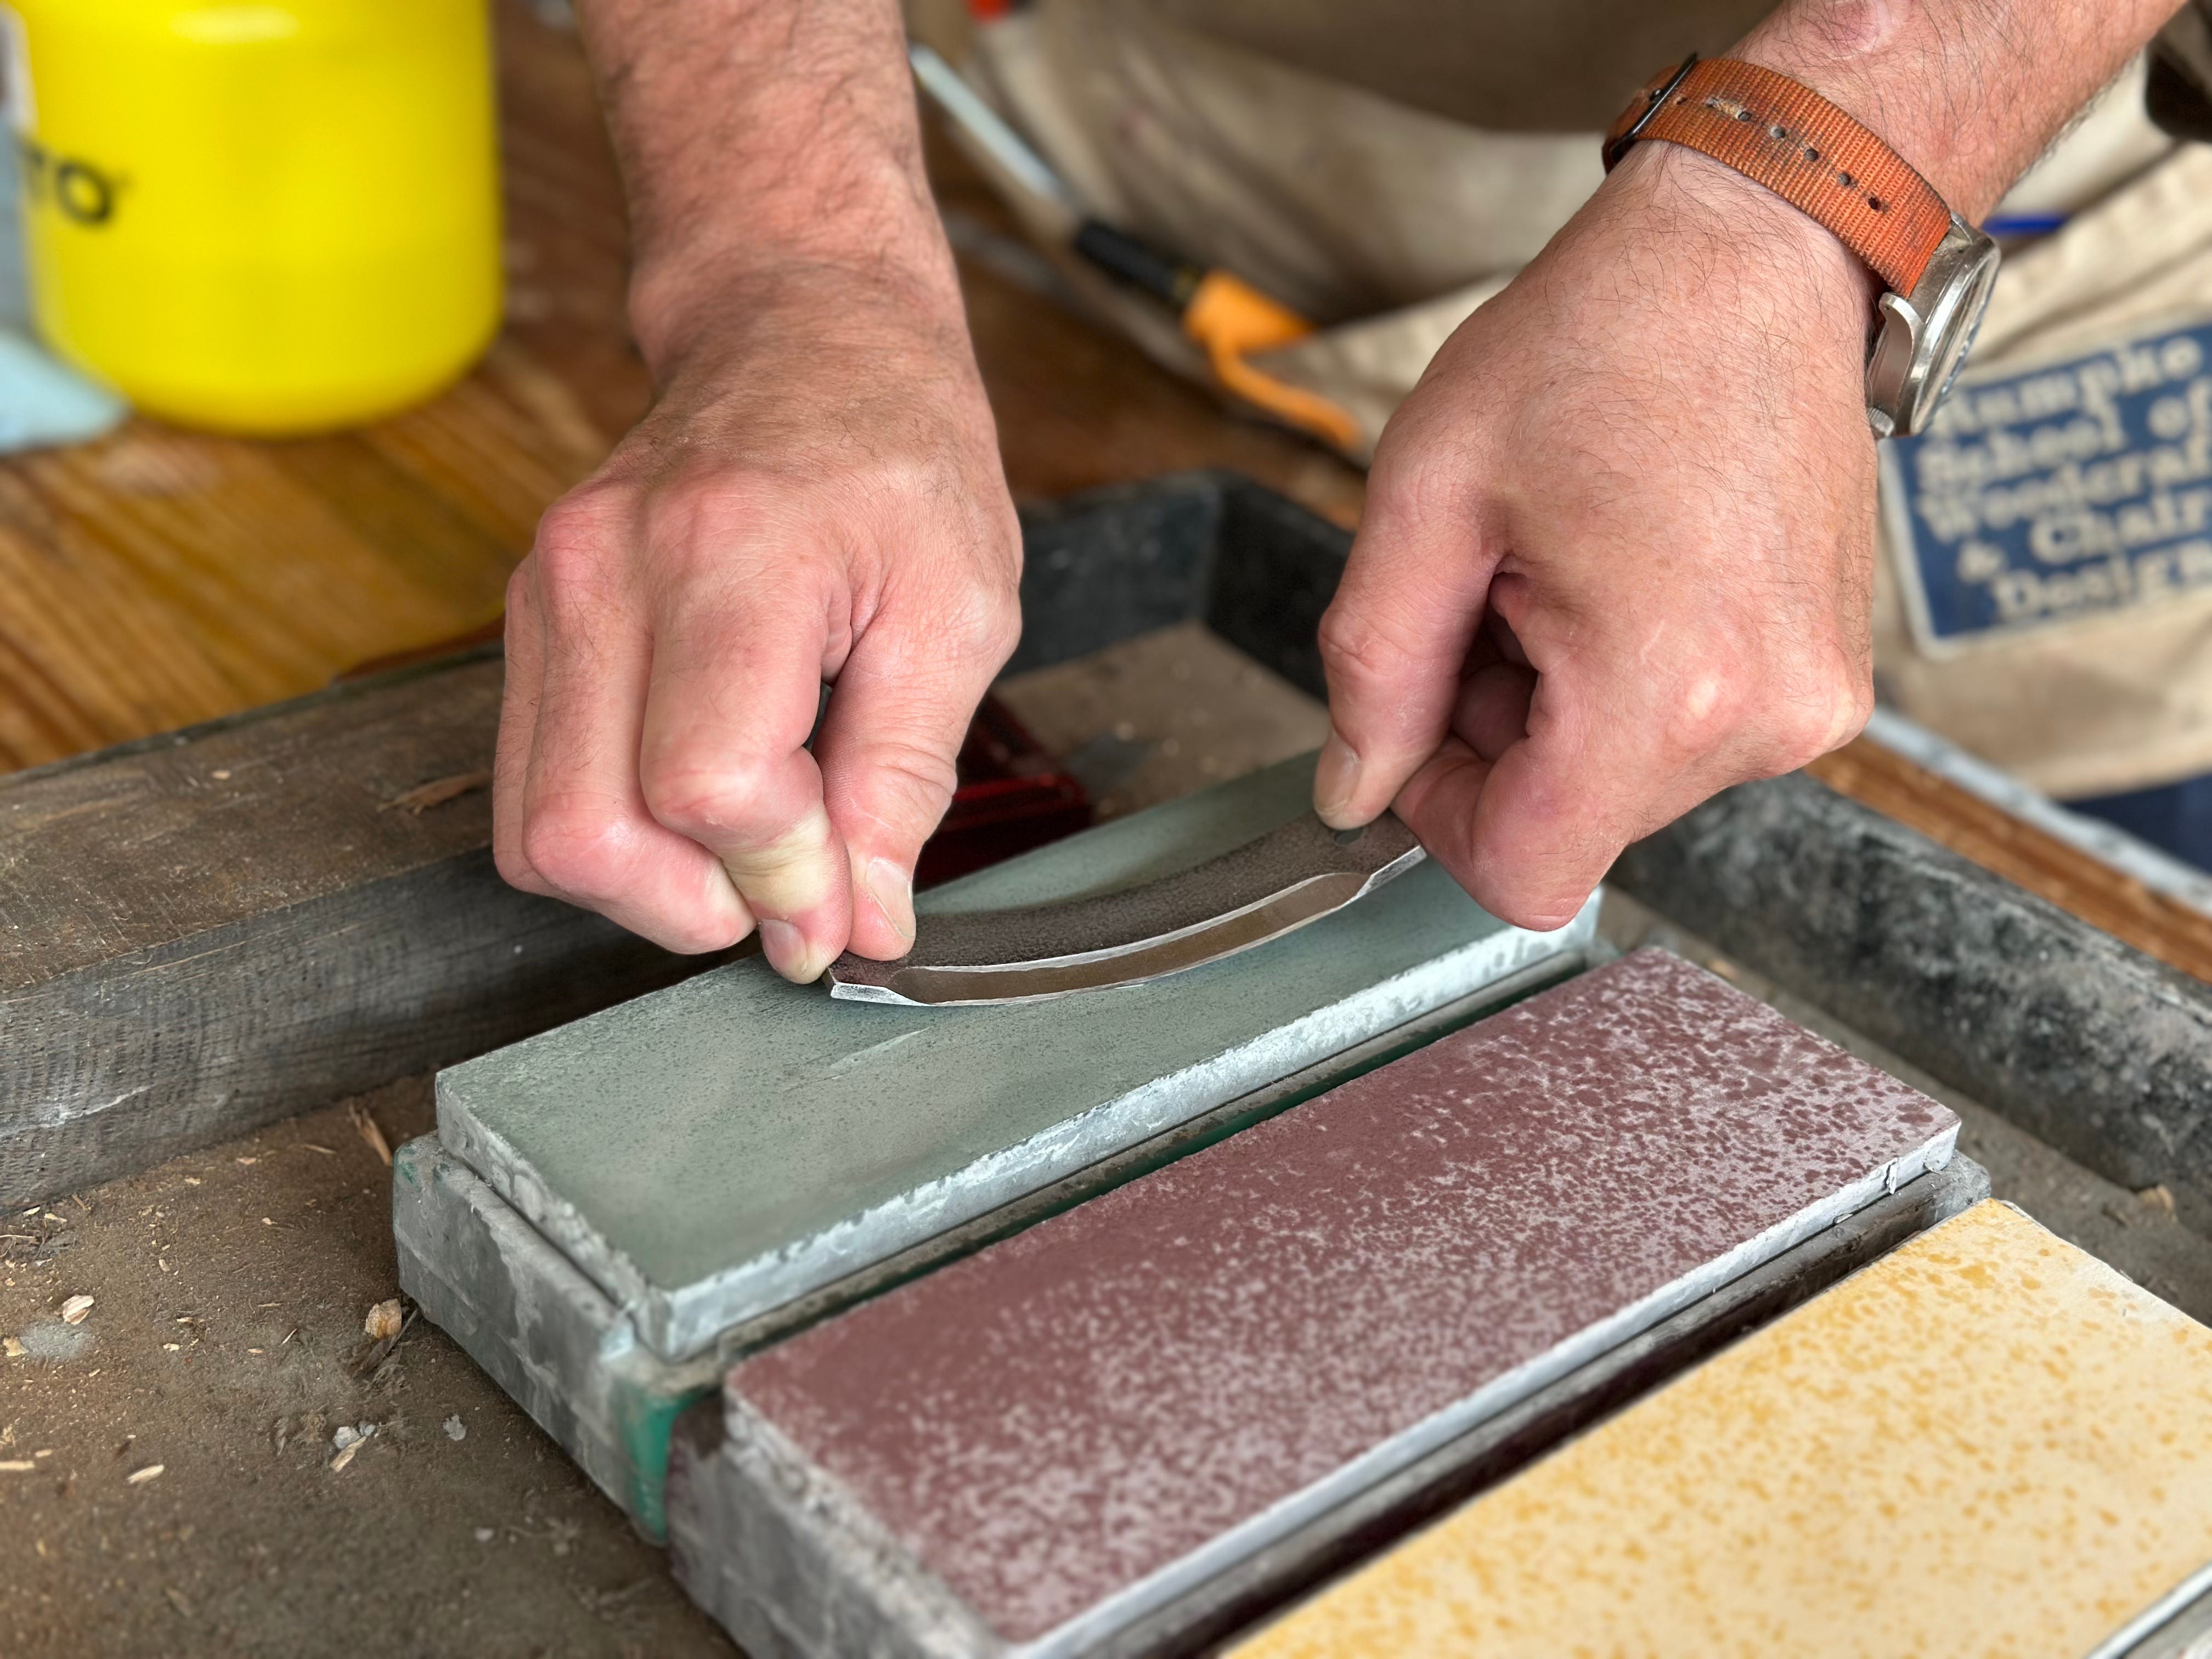
The last step is to polish the flat back of the blade. I do this on my #8,000-grit waterstone that is used for my bench tools. It takes only a dozen strokes or so on this fine stone to remove the burr from the back and give it some polish.
I then wipe off the blade with an oily rag and put the blade back in the travisher.
There are so many ways to sharpen curved blades out there that I cannot possibly discuss the pros and cons of them all. I can only report on my own journey. If you are happy with your current technique for sharpening your travishers, I urge you to ignore me.
The only reason to change techniques or tools is this: You have tried your current method for a year or two, you aren’t getting any better at it and your results are still unsatisfactory.
Have I mentioned that I hate writing about sharpening?
Well I do.
Watch a three-minute video of the sharpening process below the paywall.
Keep reading with a 7-day free trial
Subscribe to Never Sponsored to keep reading this post and get 7 days of free access to the full post archives.